Watermarking doesn’t have to be difficult. With Make Watermark you can protect your photos in just a few easy steps. Upload your images. Custom your watermark. Specify the Output Settings. Download watermarked images. No advanced editing skills required!
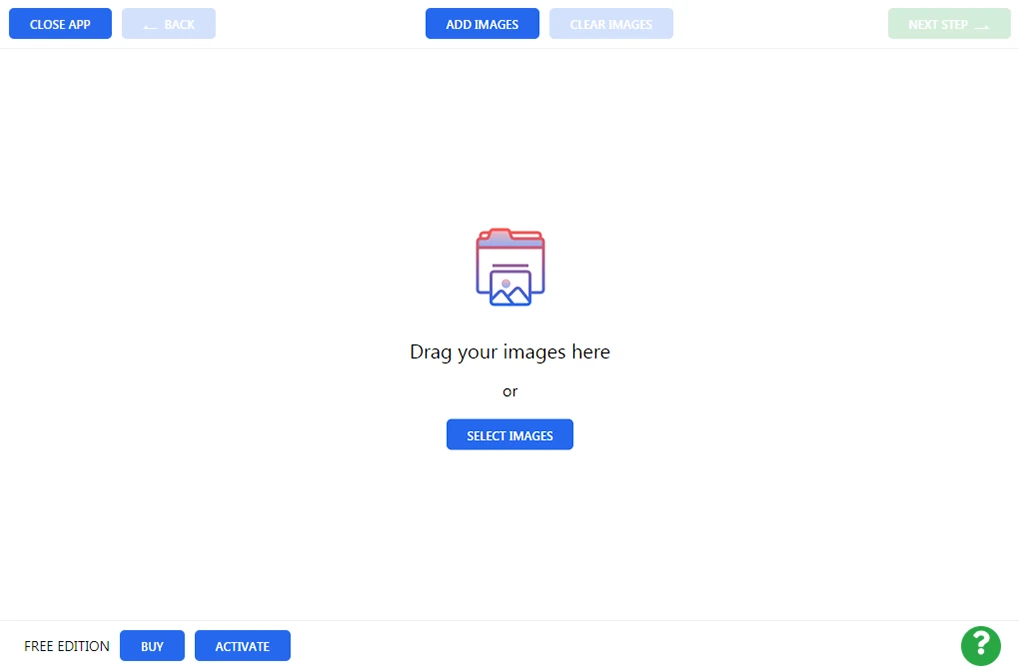
Step 1 – Upload Images Into The App
Your photos can be uploaded from your computer, Google Drive, Google Photos, or Dropbox.
From Your Computer
Drag your images directly from a folder on your computer and drop them into Make Watermark. Alternatively, you can click on “Select Images” or “Add Images” and choose “From My Computer”. Pick photos that you want to watermark in the “Open File” dialog. Press Ctrl+A on Windows or Cmd+A on Mac to select all images in a folder.
From Google Drive
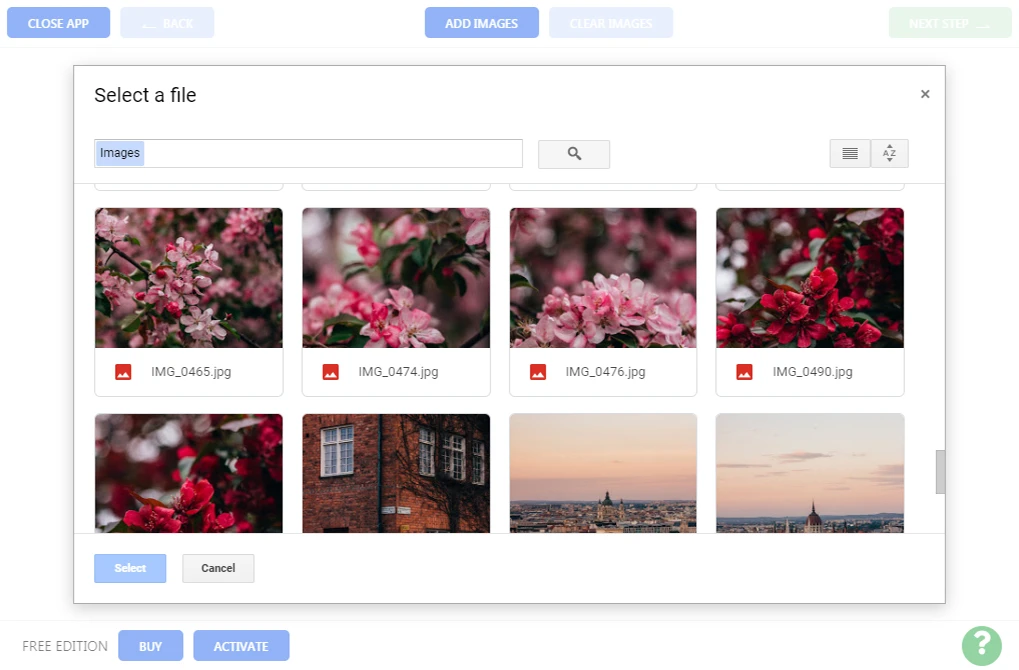
Click on “Select Images”/ “Add Images” and choose “From Google Drive”. Make Watermark needs to get approval first. Click “yes” in a popped-up dialog to grant access to your Google Drive. The Google Drive Picker will appear. Now you can choose photos for watermarking. You can select several images by clicking on them while holding Shift on your keyboard. The process is the same for Google Photos.
From Dropbox
Click on “Select Images”/ “Add Images” and choose “From Dropbox”. Make Watermark needs to get approval first. Click “yes” in a popped-up dialog to grant access to your Dropbox. The Dropbox Picker will appear. Now you can choose photos for watermarking. You can select several images by clicking on them while holding Shift on your keyboard.
Clear images
Click on “Clear” to remove all uploaded images from the app.
Step 2 – Design your watermark
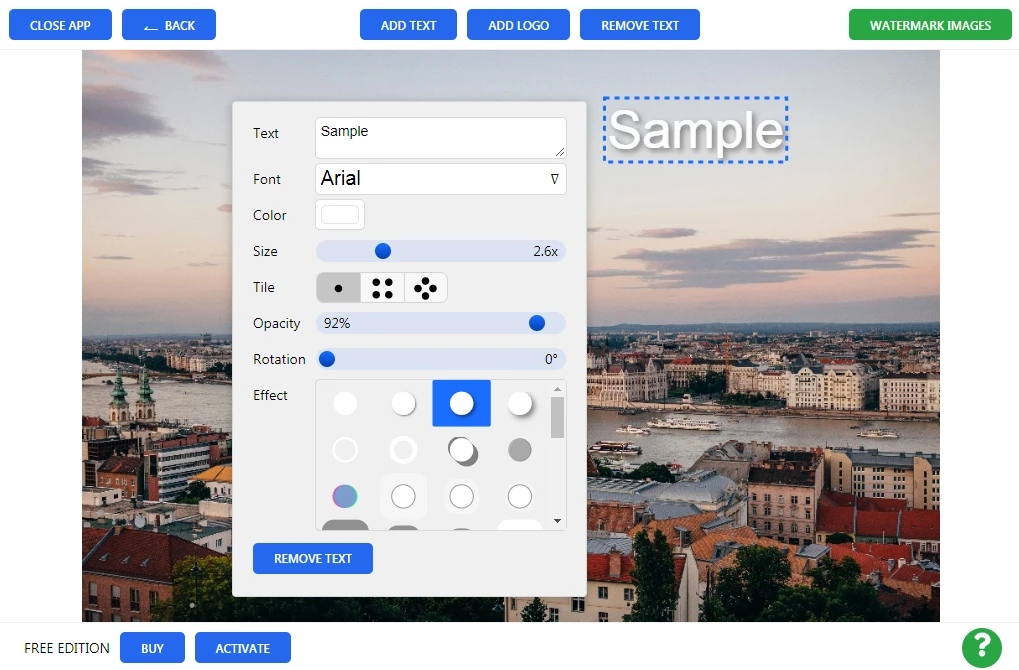
It is time to create your watermark. Make Watermark allows you to add a textual watermark (Add Text) or a logo (Add Logo). Your logo can be uploaded from your computer, DropBox, Google Drive, or Google Photos. It is possible to use one of the built-in logos from our gallery as well.
You need to click on your text or logo to select it and open the editing toolkit. A textual watermark will first appear as a word “Sample”. To change the text click inside the rectangular box next to the word “Text”. Type in your name, the name of your brand, or anything else you want. You can change the color and the size of your watermark, rotate it, adjust its opacity, and drag it to any place within your image. All the necessary tools are at your disposal.
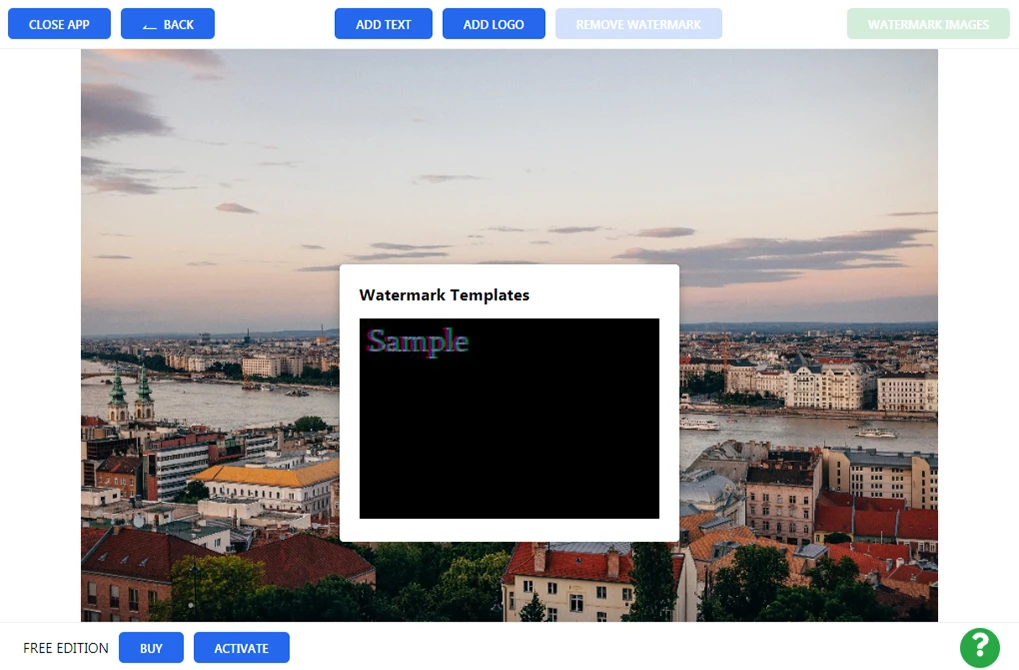
The list of previously used templates contains 10 watermarks that you have created and applied to your images recently. If you don’t see it, click on “Remove watermarks” to remove any active watermarks that are currently on your image.
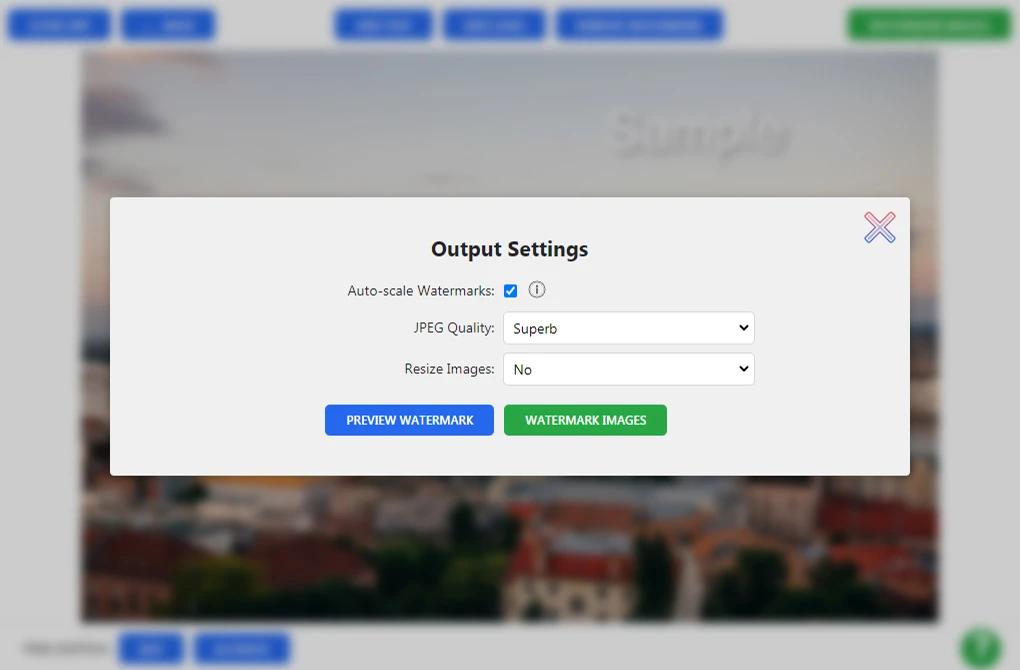
Step 3 – Specify Output Settings
Click on “Watermark Images” to go to the Output Settings. There are two options here:
- JPEG Quality. You can set the quality of your watermarked images: Medium, Good, Superb, and Maximum. The quality will affect the size of your images: the higher the quality, the bigger the files.
- Resize Images. There several options in this drop-down menu: Do not resize images, Fit image width, Fit image height, Fit width and height, and Percentage. If you choose to resize images by width, height, or both, you will need to enter the required number of pixels. It is a good practice to post lower resolution images so that the originals of your photos will not be stolen.
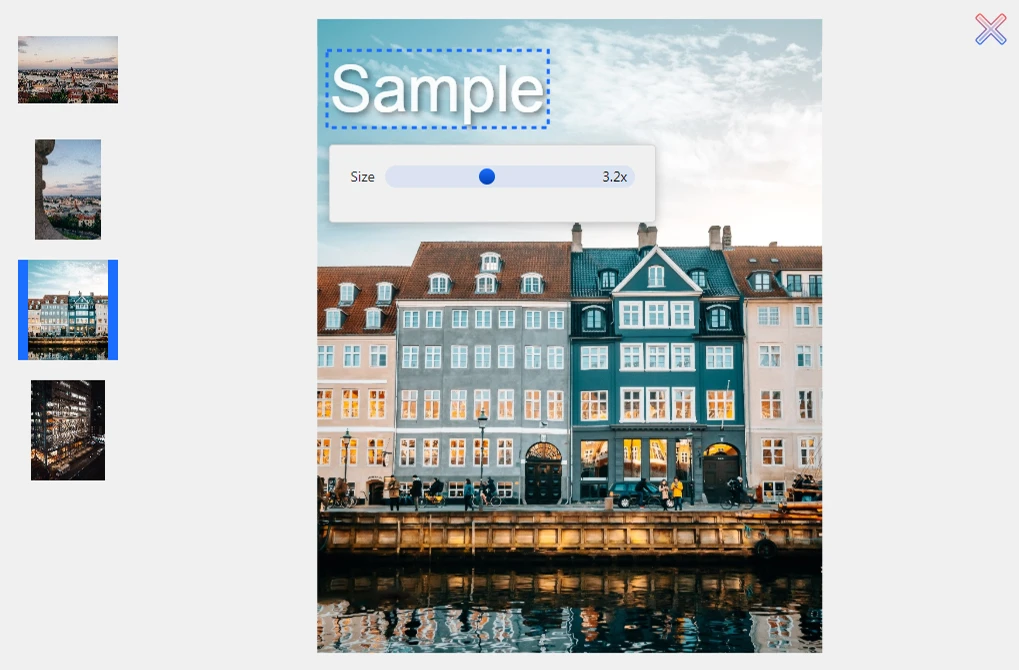
The Preview Section
By clicking on the “Preview” button in the Output Setting, you will open the Preview Section. Here you can check how your watermark looks on each photo in the batch as well as re-position it and change its size. Click on and drag your watermark to a different place within your image. Adjust the scrollbar if you need to re-size it. You can do this with each photo in the batch – the other images won’t be affected.
Click on the cross in the top right corner to close the Preview Section, when you are done.
Step 4 - Apply Your watermark.
The only thing left to do now is to click on “Watermark Images” next to the Preview. The Watermarking process will begin.
After it is finished, click on “Download All” to download a zip archive with the all watermarked images. To download each photo separately, click on the name of the photo in the list.
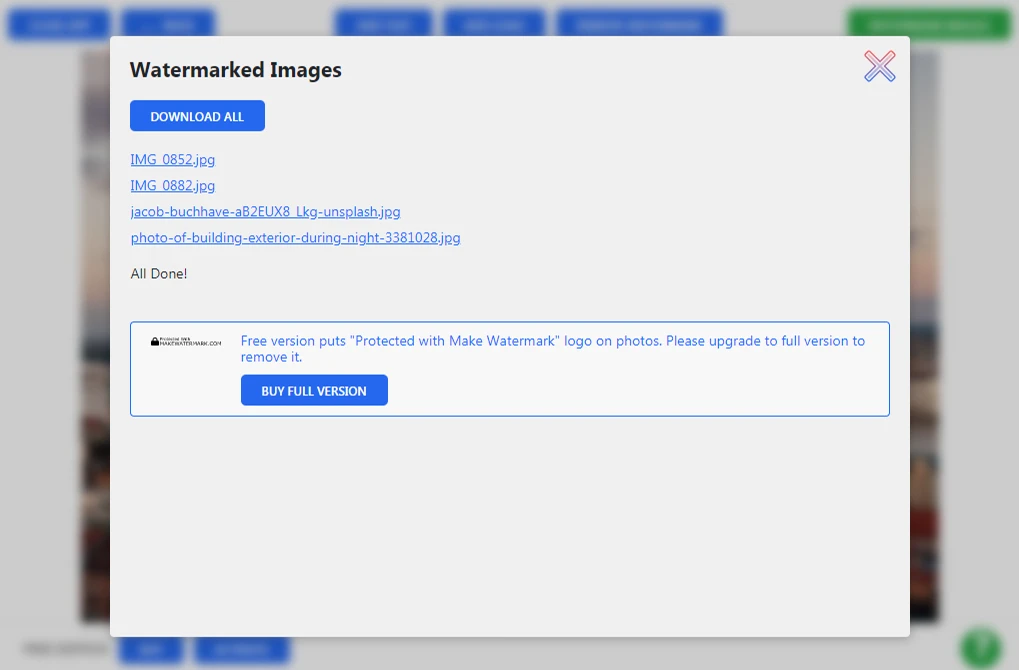
A friendly reminder: your original images will remain unchanged. You are going to download watermarked copies.